August 14, 2026
Critical Electrical Failures in Military Hummer Vehicles
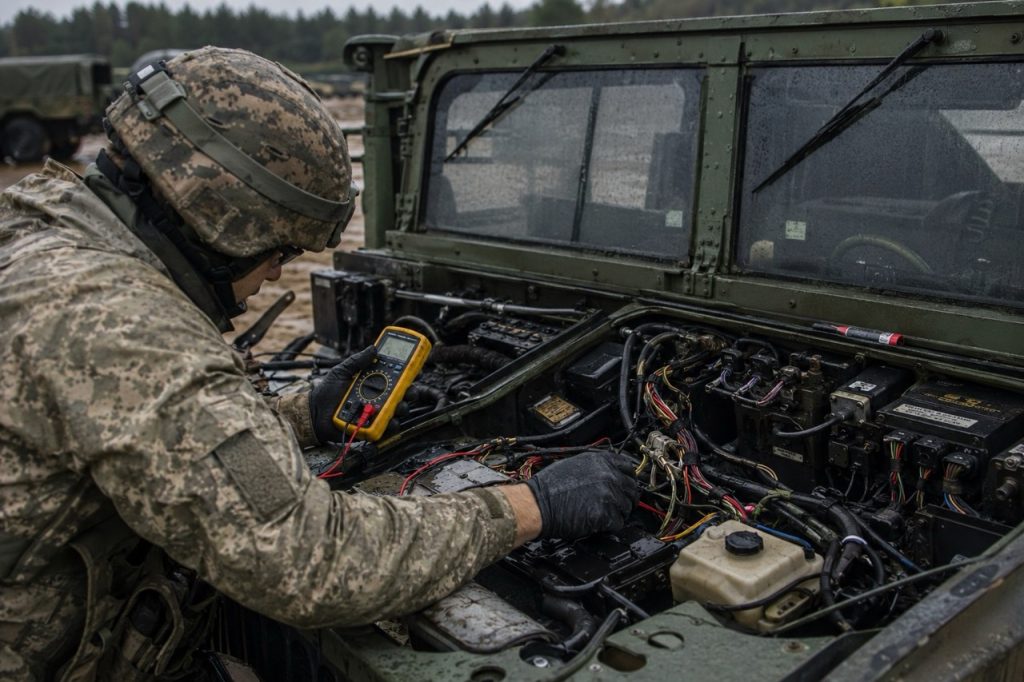
When a HMMWV (High Mobility Multipurpose Wheeled Vehicle) fails to start in the motor pool or loses power in the field, the cause is rarely dramatic. More often than not, it traces back to something as small as a corroded battery terminal, a fatigued ground strap, or a fusible link that finally gave out after years of vibration and heat cycling. Electrical failures do not always announce themselves the way a blown head gasket or a cracked axle housing does. They tend to creep in gradually, showing up first as a dim dome light, a hesitant crank, or a gauge that reads a little strangely, long before they become a no start condition that pulls a vehicle off the line.
For maintenance units and fleet managers, this matters because HMMWV electrical systems touch nearly everything the vehicle does. Starting and charging are the obvious functions, but the same wiring, grounds, and protective devices also support exterior and interior lighting, instrument gauges, communication equipment mounts, and other electrical accessories depending on how a given vehicle is configured. A fault in one branch of the system can sometimes affect components that seem unrelated, which is part of why electrical troubleshooting has a reputation for being frustrating even among experienced technicians.
The issue becomes more pronounced as HMMWV fleets age. Many of the platforms still in service, both with U.S. forces and with allied and partner nations operating HMMWVs and Hummer family vehicles, have accumulated years of operating hours, environmental exposure, field repairs, and component replacements. Every one of those factors adds a small amount of wear to wiring, connectors, and grounding points. None of it is usually enough to cause a failure on its own, but combined over time it raises the importance of disciplined inspection, accurate diagnosis, and access to correctly specified replacement components.
This article is written for the people who deal with these issues directly: HMMWV maintenance units, fleet sustainment managers, military mechanics, procurement officers, and logistics professionals supporting NATO and allied HMMWV operators. It walks through the major electrical systems on the platform, the failures that most commonly affect them, how to recognize the warning signs early, and how a sound preventive maintenance and spare parts strategy reduces unplanned downtime. Because HMMWV configurations vary considerably by model, production year, engine, and electrical architecture, this article intentionally avoids presenting any single specification, wiring diagram, or test value as universal. Readers should always confirm details against the technical manual applicable to their specific vehicle configuration, particularly the TM 9-2320-280 series that governs the M998 series HMMWV family.
It is also worth clarifying terminology up front. “Humvee” and “Hummer” are commonly used informal terms, and this article uses them interchangeably with HMMWV where natural. However, the military HMMWV is a distinct platform from the civilian Hummer H1, H2, and H3 vehicles that were later marketed under the Hummer brand. The electrical systems, voltage architecture, and components discussed here apply to the military HMMWV family, not to civilian Hummer SUVs.
HMMWV Electrical System Overview
Before diving into specific failure modes, it helps to understand how the pieces of a HMMWV electrical system fit together. This is not a substitute for the applicable technical manual, but a working overview that gives context to the failures discussed later.
Most HMMWV variants use a 24-volt DC starting and electrical system, built around two 12-volt batteries connected in series. This arrangement is documented in HMMWV technical manuals covering the battery system, which describe two batteries connected to provide 24 volts for starting and vehicle electrical loads. Because the batteries are wired in series rather than parallel, a fault affecting only one battery, one cable, or one connection can still take down the entire starting circuit, which is an important point for troubleshooting.
The starter and starter solenoid convert battery current into the mechanical force needed to turn the engine over. The generating system, typically an alternator rated for the vehicle’s electrical load, recharges the batteries once the engine is running and supplies ongoing power to electrical accessories. Some HMMWV configurations use higher output dual voltage alternators to support additional electrical loads, with documentation describing alternator output in the range needed to maintain charge across the two battery system; the exact alternator rating and output voltage depend on the specific vehicle configuration and should be verified against the applicable technical manual rather than assumed.
A voltage regulator, whether integrated into the alternator or a separate component depending on configuration, controls alternator output so that the batteries receive an appropriate charging voltage without being overcharged or undercharged. Battery cables carry heavy current between the batteries, starter, and alternator, while ground connections complete the circuit back to the chassis and engine block. Because HMMWVs rely on the vehicle frame and body as part of the return path for current, ground integrity is just as important as the positive side wiring, a point maintenance personnel sometimes underestimate.
Wiring harnesses distribute power and signals throughout the vehicle, connecting to components through a range of connectors designed to withstand vibration and some degree of environmental exposure. Fusible links and fuses protect specific circuits from overcurrent conditions, and HMMWVs also use a protective control box, sometimes referred to as a distribution box depending on variant, which is documented as protecting the vehicle electrical system in circumstances such as reversed battery polarity. The ignition or rotary switch circuit controls power delivery to the starting circuit and various accessory loads, and lighting circuits, instrument gauges and other electrical accessories branch off from the main distribution points.
Because HMMWV configurations differ across the A0, A1, and A2 variants, and further by engine type and mission package, the exact arrangement, part numbers, and ratings of these components can vary. Maintenance personnel should always reference the technical manual applicable to their specific vehicle before performing diagnosis or repair.
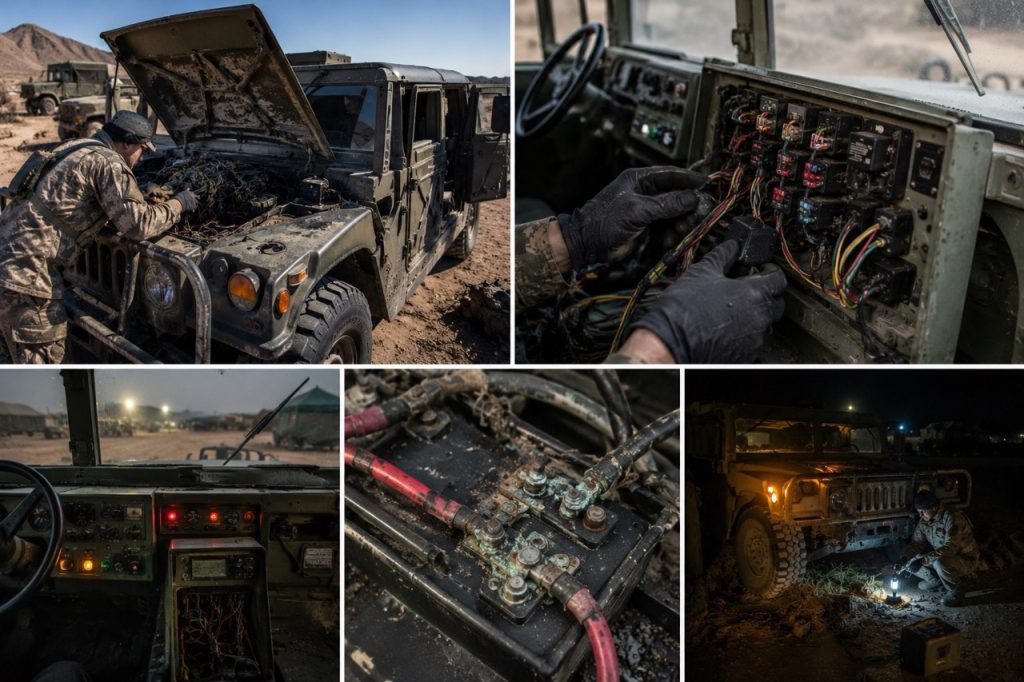
Critical Electrical Failures
The sections below cover the electrical failures that most commonly affect HMMWV fleets, along with what causes them, how to recognize them, and what maintenance response is appropriate. None of these failures are unique to any single HMMWV variant, but the exact diagnostic values and procedures for confirming them will differ depending on configuration.
Weak, Discharged or Failed Batteries
Batteries are consumable components with a finite service life, and in a 24-volt series arrangement, the condition of both batteries matters equally. A single weak battery can drag down the entire starting circuit even if its counterpart is in good condition, because the series connection means current has to pass through both. Common causes include normal age related capacity loss, sulfation from extended periods of low charge, deep discharge events from accessories left on, and undercharging caused by an unrelated fault elsewhere in the charging system.
Symptoms include slow or labored cranking, a no-crank condition, dimming lights when the starter is engaged, and batteries that repeatedly lose charge even after being recharged or replaced. Maintenance personnel should inspect battery condition, check state of charge, and verify that both batteries in the series pair are performing similarly rather than assuming that a single new battery will resolve a persistent starting problem.
Battery Imbalance and Poor Battery Connections
Even when both batteries are functionally sound, a mismatch in age, condition, or charge state between them can create starting difficulties, since the weaker battery becomes the limiting factor in the series circuit. This is one of the reasons technical manuals for HMMWV battery systems instruct measuring voltage from the positive post to the negative post of each battery individually, rather than relying solely on a reading taken across the full series pair.
Poor physical connections at the battery terminals compound this problem. A loose or partially seated terminal connection introduces resistance into a circuit that needs to carry very high current during cranking, and that resistance generates heat and voltage drop exactly when the system needs full power.
Corroded Battery Terminals
Corrosion at the battery terminals is one of the most frequently encountered electrical issues on any vehicle that operates outdoors, and HMMWVs are no exception. Battery terminals are exposed to humidity, temperature swings, and the slow chemical reaction between battery off gassing and the metal terminal and cable ends. Over time this buildup increases resistance at the connection point, which can produce symptoms ranging from slow cranking to intermittent accessory power loss.
Visual inspection is usually enough to identify significant terminal corrosion, though light surface corrosion can be present without being immediately obvious. Maintenance personnel should inspect terminals as part of routine service, clean corrosion using approved methods, and verify that connections are properly torqued and protected afterward.
Damaged or High Resistance Battery Cables
Battery cables carry substantial current and are subject to mechanical stress from vibration, movement of the engine and chassis relative to each other, and general wear over years of service. Internal strand breakage inside a cable is a particularly difficult fault to catch because the cable can appear intact from the outside while carrying significantly less current than it should. HMMWV battery cable maintenance procedures call for careful handling during disconnection and inspection, given the high current and the electrolyte hazard present in the battery box area.
Symptoms of a degraded battery cable often overlap with symptoms of a weak battery, including slow cranking and voltage drop under load, which is why cable condition should be checked as part of any starting system diagnosis rather than assumed to be fine simply because the cable looks physically undamaged.
Poor Chassis or Engine Grounding
Ground faults are among the most common and most misdiagnosed electrical problems on HMMWVs, largely because a bad ground can produce symptoms that look like almost anything else, from a no start condition to flickering lights to erratic gauge readings. Because the vehicle frame and body serve as part of the return path for current, any corrosion, loose fastener, or paint buildup at a grounding point introduces resistance into a circuit that depends on a clean, low resistance connection.
Grounding points can deteriorate for several reasons: corrosion at the contact surface, loosening of mounting hardware from vibration over time, and paint or undercoating applied during refinishing work that inadvertently insulates a ground point rather than leaving bare metal contact. This last cause is worth noting specifically, since well intentioned corrosion prevention work can sometimes create the very problem it was meant to prevent if grounding points are not masked off beforehand.
Diagnosing ground faults typically involves voltage drop testing across ground connections rather than simple continuity checks, since a ground point can show continuity with a multimeter while still presenting too much resistance to carry full current under load. Maintenance personnel should inspect known grounding points as part of routine service and address any signs of corrosion or loose hardware before they progress into intermittent electrical symptoms that are harder to trace.
Alternator Charging Failures
The alternator’s job is to recharge the batteries and supply the vehicle’s running electrical loads once the engine is started. When alternator output falls below what the system needs, batteries slowly discharge even during normal operation, which can present as a vehicle that starts fine after sitting overnight but develops electrical problems during extended operation or repeated short trips. Causes of reduced alternator output include internal component wear, a failed voltage regulator, damaged or loose drive belts on configurations where belt condition affects alternator speed, and wiring faults in the alternator output circuit.
Voltage Regulator Failures
The voltage regulator controls how much current the alternator sends to the batteries and electrical system. A regulator that fails toward undercharging leaves the batteries chronically low, while a regulator that fails toward overcharging can cause excessive voltage that shortens battery life and stresses other electrical components. Distinguishing between an alternator fault and a regulator fault requires proper diagnostic testing rather than assumption, since both faults can produce similar symptoms of poor charging performance. Numerical voltage thresholds for a healthy charging system vary by HMMWV configuration, so any diagnostic voltage readings should be checked against the technical manual for the specific vehicle rather than a generic value.
Alternator Wiring Faults
Even a fully functional alternator and regulator cannot charge the batteries properly if the wiring connecting them is damaged, corroded, or loose. Alternator wiring is subjected to engine bay heat, vibration, and, on vehicles that have seen water crossings or heavy weather exposure, potential moisture intrusion at connectors. A wiring fault in this circuit can sometimes mimic an alternator failure closely enough that a technician replaces a functioning alternator without resolving the underlying problem, which underscores the value of following a structured troubleshooting sequence rather than swapping components based on guesswork.
Damaged Wiring Harnesses
HMMWV wiring harnesses route through the engine compartment, under the body, and through the cab, and different sections of harness face different stresses. Engine compartment harnesses deal with heat and vibration. Underbody harnesses face exposure to mud, water, road debris, and abrasion against the frame or other components if not properly secured. Cab harnesses are generally more protected but can still suffer from chafing where they pass through bulkheads or flex points.
Common harness damage includes chafed insulation from rubbing against metal edges, broken conductors from repeated flexing, and connector damage at the ends where the harness terminates. Because a harness carries many circuits at once, damage in one section can potentially affect several unrelated systems, which is one reason electrical symptoms on HMMWVs sometimes seem to cluster in odd combinations.
Loose, Corroded or Damaged Connectors
Connectors are a frequent point of failure because they combine mechanical, electrical, and environmental stress in a small package. Corrosion inside a connector housing, loosening of the connector locking mechanism over time, and physical damage from field handling can all introduce resistance or intermittent contact into a circuit. Connectors located in the engine compartment, where they face heat cycling and occasional exposure to moisture, are particularly worth attention during inspection.
Fusible Link Failures
Fusible links protect circuits from overcurrent conditions by failing before wiring or components downstream are damaged. A fusible link that has failed is doing exactly what it was designed to do, but the underlying cause of the overcurrent condition still needs to be identified and corrected. Simply replacing a blown fusible link without determining why it blew risks a repeat failure, or worse, masking a fault that could cause more serious damage.
Protective Control Box and Distribution Box Problems
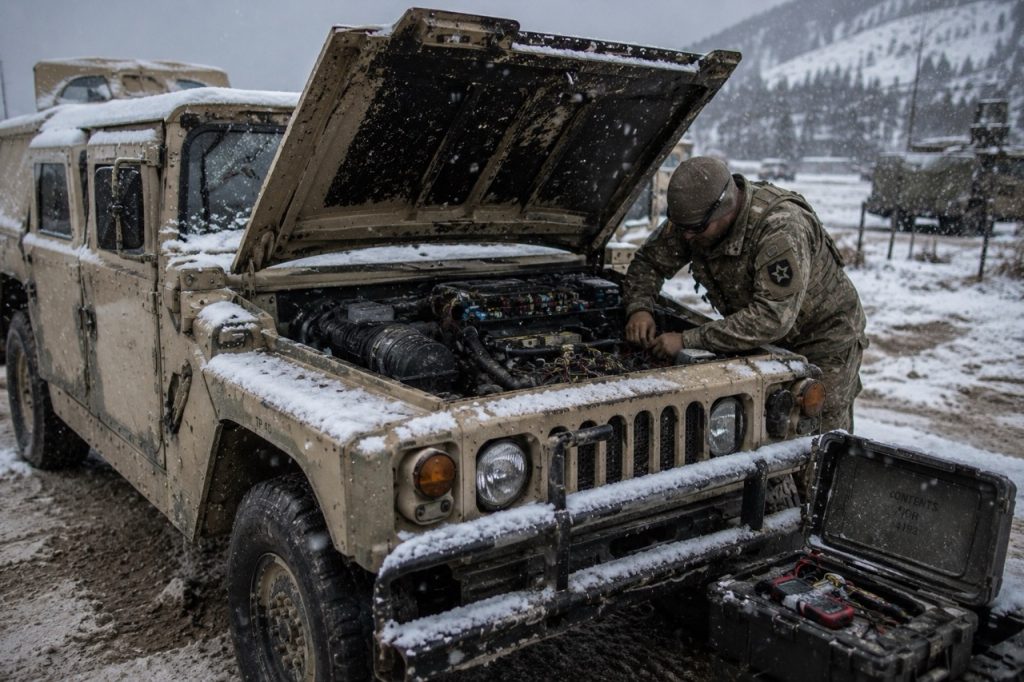
The protective control box on HMMWV platforms is documented as protecting the vehicle electrical system under certain fault conditions, including cases of reversed battery polarity. Because this component sits at a critical point in the electrical architecture, a fault within it, or damage to its connections, can affect multiple downstream circuits at once. Corrosion at the connectors serving the protective control box has been noted as a recurring practical issue in field experience, which makes this a worthwhile inspection point during troubleshooting of broader electrical symptoms, particularly no start conditions that do not trace back cleanly to the battery or starter.
Starter Motor and Starter Solenoid Electrical Faults
The starter solenoid engages the starter motor and completes the high current circuit needed for cranking. Electrical faults in this circuit, as opposed to mechanical wear in the starter motor itself, can include a solenoid that fails to engage, worn or corroded solenoid contacts, or wiring faults in the starter control circuit that prevent the solenoid from receiving its engagement signal. Symptoms often include a clicking sound without the engine turning over, which can indicate either a starter or solenoid fault or, in some cases, insufficient current reaching the starter due to a battery, cable, or ground problem elsewhere in the circuit. This overlap is exactly why a systematic diagnostic approach matters more than reacting to the first symptom observed.
Ignition and Rotary Switch Circuit Problems
The ignition or rotary switch circuit controls power delivery for starting and various accessory functions. Wear inside the switch itself, or faults in the wiring connected to it, can produce intermittent starting problems, accessories that work inconsistently, or circuits that behave differently depending on switch position in ways that do not match expected operation.
Lighting Circuit Failures
Lighting circuits, covering headlights, blackout lighting, marker lights, and interior lighting depending on configuration, are exposed to the same environmental stresses as the rest of the vehicle’s electrical system. Failures in these circuits are usually less operationally critical than a starting or charging fault, but they still matter for safety and mission readiness, particularly for blackout driving capability. Common causes include bulb failure, connector corrosion, and wiring damage in harness sections that route to exterior lighting fixtures.
Instrument Cluster and Gauge Electrical Faults
Gauge and instrument faults are sometimes dismissed as minor, but they can be an early warning of a broader electrical problem, particularly when a voltmeter or battery gauge is involved, since that gauge is specifically intended to indicate the electrical system’s charging status. Faults can result from wiring issues, connector problems at the gauge cluster, or grounding issues affecting the instrument circuit specifically.
Intermittent Electrical Faults
Intermittent faults are widely regarded as the most difficult electrical problems to diagnose, precisely because the fault may not be present when the vehicle is being tested. Causes often involve a connection that is marginal, making contact under some conditions of vibration, temperature, or position but not others. Chafed wiring that only makes contact with a ground point under certain flex conditions is a classic example. Diagnosing intermittent faults typically requires attempting to reproduce the conditions under which the symptom occurs, rather than relying solely on static testing with the vehicle stationary.
Parasitic Electrical Loads
A parasitic load is current draw that continues after the vehicle is shut down, which over time discharges the batteries even without a charging system fault. Sources can include accessories that are not fully switched off, faults in relays or control modules that keep a circuit energized when it should not be, and, on vehicles with added equipment, aftermarket electrical accessories that were not properly integrated into the vehicle’s power management. Diagnosing a parasitic load typically involves measuring current draw with the vehicle off, using appropriate test equipment such as a shunt or clamp meter, and isolating circuits one at a time until the source is identified.
Electrical Problems from Unauthorized or Poorly Executed Modifications
Field modifications and added equipment are common on operational HMMWVs, but electrical additions that are not properly integrated into the vehicle’s wiring, fusing, and grounding architecture create a disproportionate share of downstream electrical problems. Improper splices, undersized wiring for the added load, missing or incorrect fusing, and poor grounding of added equipment can all introduce faults that are difficult to trace precisely because they were not part of the original vehicle documentation. Maintenance units should document any electrical modifications thoroughly and, wherever possible, have them reviewed against applicable technical standards before they are considered a permanent part of the vehicle’s configuration.
Battery and Starting Problems in Detail
Because starting problems are the most immediately disruptive electrical failures a HMMWV can experience, they deserve a closer look as a category. A HMMWV starting system depends on several things working together: batteries with adequate capacity and similar condition, cables capable of carrying high current with minimal resistance, sound ground connections, and a functioning starter and solenoid.
Slow cranking suggests the starting circuit is receiving some current but not enough, which points toward weak batteries, high resistance cables or connections, or a poor ground rather than a completely dead circuit. A no-crank condition, where nothing happens at all when the operator attempts to start the vehicle, points toward a more complete break in the circuit, which could be a fully discharged or failed battery pair, a major cable or connection failure, a blown fusible link, or a starter solenoid that is not engaging. Clicking sounds without cranking often indicate the solenoid is receiving a signal but the starter is not turning over, which could be a solenoid contact issue, a starter fault, or insufficient current reaching the starter due to an upstream problem.
Vehicles that have been in extended storage present their own starting challenges, since batteries self-discharge over time and extended periods without charging can accelerate capacity loss. Repeated battery discharge, where a vehicle starts fine after charging but loses its charge again within a short period even without heavy accessory use, points toward either a charging system fault or a parasitic load rather than the batteries themselves.
This is the central point worth emphasizing for maintenance planning: replacing batteries is often the fastest fix, but it does not address an underlying cable, connection, ground, charging system, or parasitic load problem if one of those is the actual root cause. A vehicle that keeps returning with the same starting complaint after a battery replacement is a strong signal that the root cause has not yet been identified.
Wiring, Connectors and Grounding in Harsh Environments
Wiring and connection problems are frequently cited as among the hardest HMMWV electrical faults to diagnose, not because the underlying physics is complicated, but because the fault can be located anywhere along a long harness run, may only manifest under specific conditions, and often does not produce a clean, repeatable symptom.
Military vehicles operating in mud, standing water, dust, extreme heat, extreme cold, and rough terrain place additional stress on electrical connections and harnesses well beyond what a comparable civilian vehicle would typically experience. Corrosion accelerates in humid or salt-exposed environments. Chafing occurs where harnesses rub against frame members, brackets, or other components during vibration and flexing over rough terrain. Moisture intrusion into connectors can occur after water crossings or heavy rain exposure, particularly if connector seals have degraded with age. Vibration related failures, including broken conductors and loosened terminals, accumulate gradually over years of operation on unimproved roads and off road terrain.
None of this means every environmental exposure produces an electrical failure, and it would be inaccurate to claim so. What can be said with confidence is that these conditions increase the probability of the failure modes described earlier in this article, which is why post deployment and post field exercise inspections of wiring, connectors, and grounding points are a meaningful part of sustaining fleet reliability, particularly after any deep water crossing or unusually severe operational conditions.
Warning Signs Maintenance Teams Should Not Ignore
Certain symptoms deserve attention before they progress into a mission affecting failure. These include a battery that repeatedly loses charge despite being recharged or replaced, lighting that dims or flickers unpredictably, voltage readings that fall outside expected ranges for the vehicle’s configuration, charging system warnings or abnormal gauge behavior, gauges that behave intermittently, hesitation or delay before the starter engages, slow cranking, electrical accessories that cut out unexpectedly, fuses or fusible links that blow repeatedly, any burning smell or visibly damaged wiring, corroded terminals, and any electrical behavior that comes and goes without an obvious cause.
The common thread across all of these symptoms is that they represent the electrical system trying to tell maintenance personnel something before it fails completely. Recurring symptoms should prompt an actual root-cause investigation rather than a pattern of replacing the same component repeatedly and hoping the next one lasts longer.
Electrical Troubleshooting Strategy
A disciplined troubleshooting approach saves time and reduces unnecessary parts consumption compared to a trial and error approach. HMMWV technical manuals describe the value of functional flow schematics for troubleshooting, which show how each component depends on the output of the ones before it in the circuit, allowing a technician to reason through where a fault is most likely located based on what is and is not working.
A sound general approach includes confirming the reported symptom exists and understanding exactly when it occurs, checking the vehicle’s specific configuration against the applicable technical manual before assuming a generic specification applies, performing a visual inspection of accessible wiring, connectors, and grounds, checking battery condition and connections, checking ground points using appropriate testing methods, checking relevant fuses, fusible links, and protective components, testing charging system performance, inspecting wiring and connectors along the affected circuit, performing voltage and continuity tests as appropriate to isolate the fault, narrowing the fault systematically rather than replacing components speculatively, repairing or replacing the confirmed failed component, and retesting the full system afterward to confirm the repair resolved the issue without introducing a new one.
Diagnostic equipment appropriate to this work includes a standard multimeter for voltage, resistance, and continuity testing, and, where available and applicable to the vehicle’s support level, military test equipment such as the STE/ICE-R system, which HMMWV technical documentation references for tasks including current draw measurement using a shunt. Maintenance personnel should always follow the troubleshooting procedures and safety precautions specified in the applicable technical manual for their vehicle’s variant rather than relying on generic automotive diagnostic assumptions, since HMMWV electrical architecture, including its 24-volt configuration, differs meaningfully from standard 12-volt commercial vehicle systems.
Preventive Electrical Maintenance
Preventive maintenance is where most unplanned electrical downtime gets avoided before it happens. A sound preventive approach includes regular battery inspection covering condition, charge state, and terminal cleanliness, inspection of terminal and cable connections for tightness and corrosion, inspection of known grounding points, visual inspection of accessible wiring harnesses for chafing, damage, or deterioration, inspection of connectors for corrosion, damage, or loose engagement, periodic charging system checks to confirm alternator and regulator performance, inspection of fuses and fusible links, and additional inspection following any deep water crossing or unusually severe environmental exposure that could have introduced moisture or debris into the electrical system.
Equally important is disciplined documentation of recurring electrical faults. A vehicle that returns repeatedly with a similar complaint, even if each individual repair seems to resolve the symptom temporarily, is signaling an unresolved root cause that deserves deeper investigation. Finally, when components do need replacement, using appropriately qualified replacement parts matters as much as the maintenance procedure itself, since a poorly specified component can reintroduce the same failure shortly after repair. This article does not provide specific maintenance intervals, since these vary by HMMWV variant and operating conditions; maintenance personnel should follow the schedule specified in the applicable technical manual for their vehicle.
Spare Parts and Fleet Readiness
Electrical reliability and spare parts logistics are inseparable in practice. Maintenance units need dependable access to correctly specified electrical components, including batteries, alternators, voltage regulators, starter components and solenoids, cables, connectors, wiring harness components, fuses and fusible links, switches, lighting components, and protective electrical components such as the protective control box.
Poor-quality, incorrectly specified, obsolete, or improperly sourced replacement parts create additional troubleshooting burden rather than resolving it. A part that is nominally the correct type but not properly matched to the vehicle’s specific configuration can introduce new compatibility issues, and low-quality components are more prone to premature failure, which sends the same vehicle back into the shop sooner than it should return.
For fleet sustainment managers and procurement officers, this makes several factors central to an effective spare parts strategy: correct part identification against the vehicle’s specific configuration, verified compatibility rather than assumed fit, access to relevant technical documentation, traceability of part sourcing, supplier reliability and consistency, quality assurance practices, realistic lead-time management for planning purposes, sound inventory planning that accounts for known high turnover electrical components, active management of parts affected by obsolescence, and reliable sourcing relationships that can be depended upon across multiple procurement cycles rather than one off purchases.
Aging HMMWV Fleets
Many HMMWVs currently in service, both within U.S. forces and among NATO and allied operators, have been in the field for a considerable number of years. Age itself does not directly cause electrical failure, but it does compound the factors that contribute to it. Aging wiring insulation can become more brittle over time. Connectors that have been mated and unmated repeatedly over years of maintenance work experience gradual wear. Vehicles with a long repair history accumulate a patchwork of past fixes, some of which may not have been executed to original specification. Environmental exposure accumulates cumulatively across a vehicle’s service life. Fleet modifications added over time can introduce additional complexity into the electrical architecture. Parts obsolescence becomes a more pressing concern as original components age out of production. Configuration differences between vehicles that started identical but received different repairs and modifications over the years add further complexity to standardized maintenance planning.
None of this means an aging HMMWV is destined for electrical failure. It does mean that inspection discipline, accurate condition monitoring, configuration control, and reliable parts availability become increasingly important as a fleet ages, since the margin for deferred maintenance narrows over time.
How Electrical Failures Affect Military Vehicle Readiness
Electrical faults affect readiness in ways that extend beyond the immediate vehicle involved. A vehicle down for electrical troubleshooting occupies maintenance bay time and technician attention that could otherwise be allocated elsewhere, particularly when the fault is intermittent and requires repeated diagnostic sessions to isolate. Mean time to repair tends to increase for electrical faults relative to more straightforward mechanical repairs, precisely because of the diagnostic complexity discussed throughout this article. Spare parts consumption for electrical components adds to overall sustainment costs and logistics planning requirements. At the fleet level, a pattern of recurring electrical issues across multiple vehicles can signal a systemic problem, whether that is an environmental factor affecting the fleet broadly, a parts quality issue with a particular supplier, or a maintenance practice that needs correction. All of these factors ultimately connect back to mission support, since a vehicle unavailable for electrical reasons is unavailable regardless of the underlying cause.
The AB Defence Perspective
Reliable HMMWV sustainment depends on more than sound mechanical maintenance. It depends equally on having access to electrical spare parts that are correctly identified, properly matched to the vehicle’s configuration, and available when they are needed rather than months into a lead time that a unit cannot afford to wait out.
AB Defence supports military vehicle maintenance units, fleet sustainment managers, and defense procurement organizations with accurate part identification, reliable sourcing, and attention to component compatibility across HMMWV and other military vehicle platforms. For organizations managing HMMWV fleets, particularly aging fleets where configuration differences and parts obsolescence add complexity to sourcing decisions, working with a logistics partner that understands these distinctions can meaningfully reduce the delays that turn a routine electrical repair into extended vehicle downtime.
Organizations seeking dependable HMMWV spare parts support, including electrical system components, are welcome to contact AB Defence to discuss current sustainment requirements and procurement needs.
Related Military Spare Parts Categories, Vehicle Platforms & Technical Guides
Explore AB Defence’s NATO-codified (NSN) and genuine OEM spare parts catalog, platform technical specifications, and sustainment engineering guides related to this article:
Stocked Spare Parts Categories (NSN & OEM Catalog)
- HMMWV (Humvee / Hummer M998) Spare Parts (203 stocked parts)
- Electrical, Electronic & Vision Systems for Military Vehicles (250 stocked parts)
- Military Brake Calipers, Master Cylinders & Hydraulic Systems (103 stocked parts)
- Military Portal Axles, Differentials & Drive Shafts (107 stocked parts)
- Military Engine Cooling Systems, Radiators & Water Pumps (57 stocked parts)
- Full NATO NSN & OEM Spare Parts Catalog (16,760+ Parts)
Compatible Vehicle Platforms & System Hubs
- HMMWV M998
- Tactical Wheeled Vehicles
- Electrical, Electronic & Vision Systems
- Brake & Suspension Systems
- Engine & Powertrain Systems
- Request a B2B Quotation (RFQ) & Technical Support